In this post we will explore how to create a dramatic lighting affect in your bathroom with a wall grazing light fixture. We will take a look at an expensive commercially available product along with a couple of reasonably priced DIY solutions.
After you read this post check out the update: Possibly The Ultimate Bathroom Wall Grazer? Including a video on how to frame a light pocket.
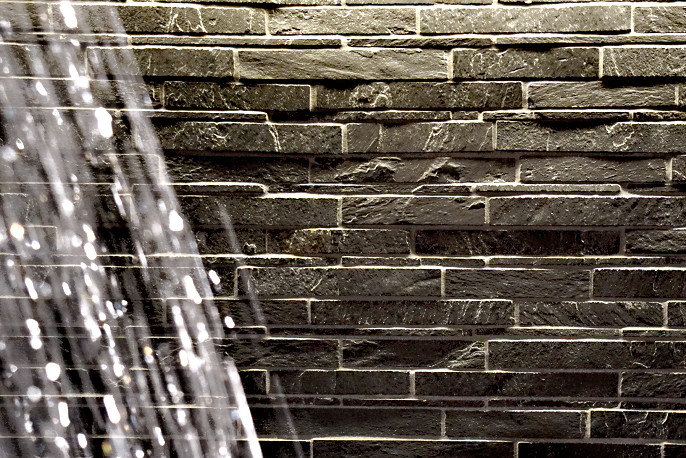
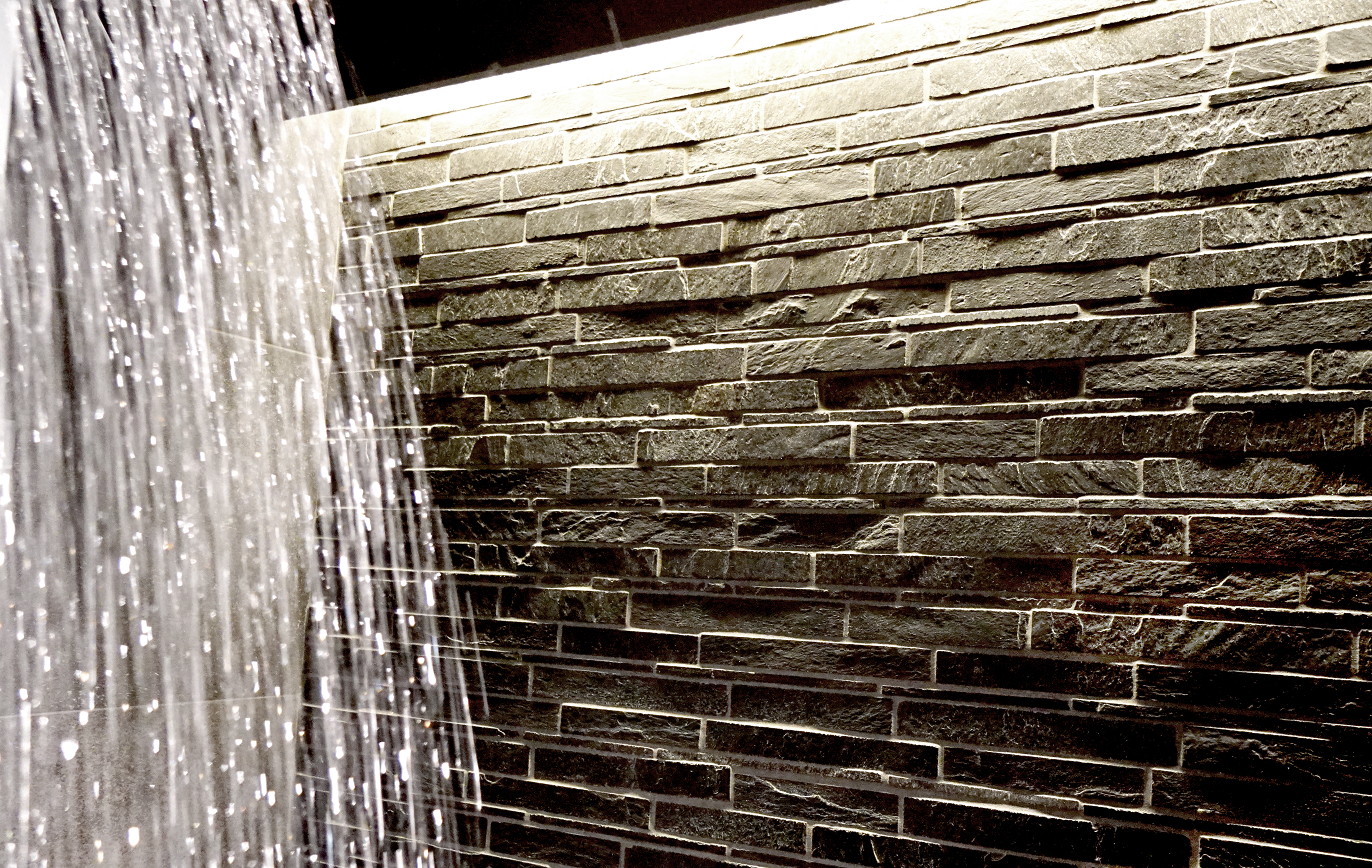
The “wall grazer” segment of lighting products is typically seen exclusively in commercial applications. Wall grazing fixtures are designed to highlight wall surfaces. They are particularly good at highlighting textured materials. A wall grazing fixture is the perfect way to create a dramatic feature wall. The typical wall grazer functions by casting light down the surface of the wall emphasizing the texture by creating dramatic shadows. This is achieved by mounting the fixture adjacent to the wall surface. A recessed ceiling pocket or simple valence usually hides the light source.
 LED fixture pictured above: 8’ long fixture [5300-WL] from Dreamscape with clear acrylic enclosure and driver [DLM-40 L24], the color temperature is 3000k – approximately $752. More pictures of this project may be viewed in the Bernardsville Project portfolio. [photo credit: Isa Aydin]
First off, you should limit your search to only include LED fixtures; they are far superior to technologies available in the past (such as fluorescent). The LED variety will give you thousands of hours of service without the need for maintenance. Second, if you are using this in a shower, make sure you specify a “damp” or “wet location” fixture. Let’s take a look at two options to create dramatic lighting: Commercially available and DIY.
Fixture pictured above: 10’-9” long fixture [VersaLux VWG3 LED] from Starfire Lighting with built-in dimmable driver and a 3000k color temperature – approximately $1545. More pictures of this project in the Florham Park Phase II portfolio. [photo credit: Peter Rymwid]
Commercially available fixtures: These types of fixtures are available from many manufacturers, in this post we will look at a model from Starfire Lighting. The commercial products are superior to the DIY versions in many ways; They are designed from the ground up for the task at hand. They are extremely bright and have built-in, finely focused, directional reflectors. You will find many additional options with these fixtures such as wattage, color temperature, power source, dimming capacity and installation options. Most commercial fixtures are custom made to a specified length providing 100% uninterrupted light coverage. I always specify the commercial variety unless the project budget dictates otherwise. The cost of installation runs about the same for both commercial and DIY styles. Keep in mind the lead time can be long when ordering these units, sometimes as much as 8-10 weeks.
Above: 4’ long fixture [5200-WL] from Dreamscape with frosted acrylic enclosure and driver [DLM-40 L24], the color temperature is 3000k – approximately $335.
DIY fixtures: On most projects budget does matter. In fact, most wall grazers I have specified have been the DIY type. For about half the cost you get within 85-90% of the light quality a commercial unit produces. The main differences are in the brightness, reflective housings and sometimes in the lengths available. You will still have options for color temperature and some dimming. I have the budget version in my own shower and have never had any regrets. One advantage of the DIY version is that the housings are tiny and you can use them in very tight spaces. In this post you are looking at 2 installations using Dreamscape LED light strips for wet location use. The Dreamscape product is very low profile, lightweight and simple to use. At a life span of 50,000 hours, you will never have to think about this fixture again.
Wall grazer installation options and details
Installation options: Whether you decide to go DIY or commercial you will need to create a way to hide or camouflage your fixture. I have used two successful methods outlined below.
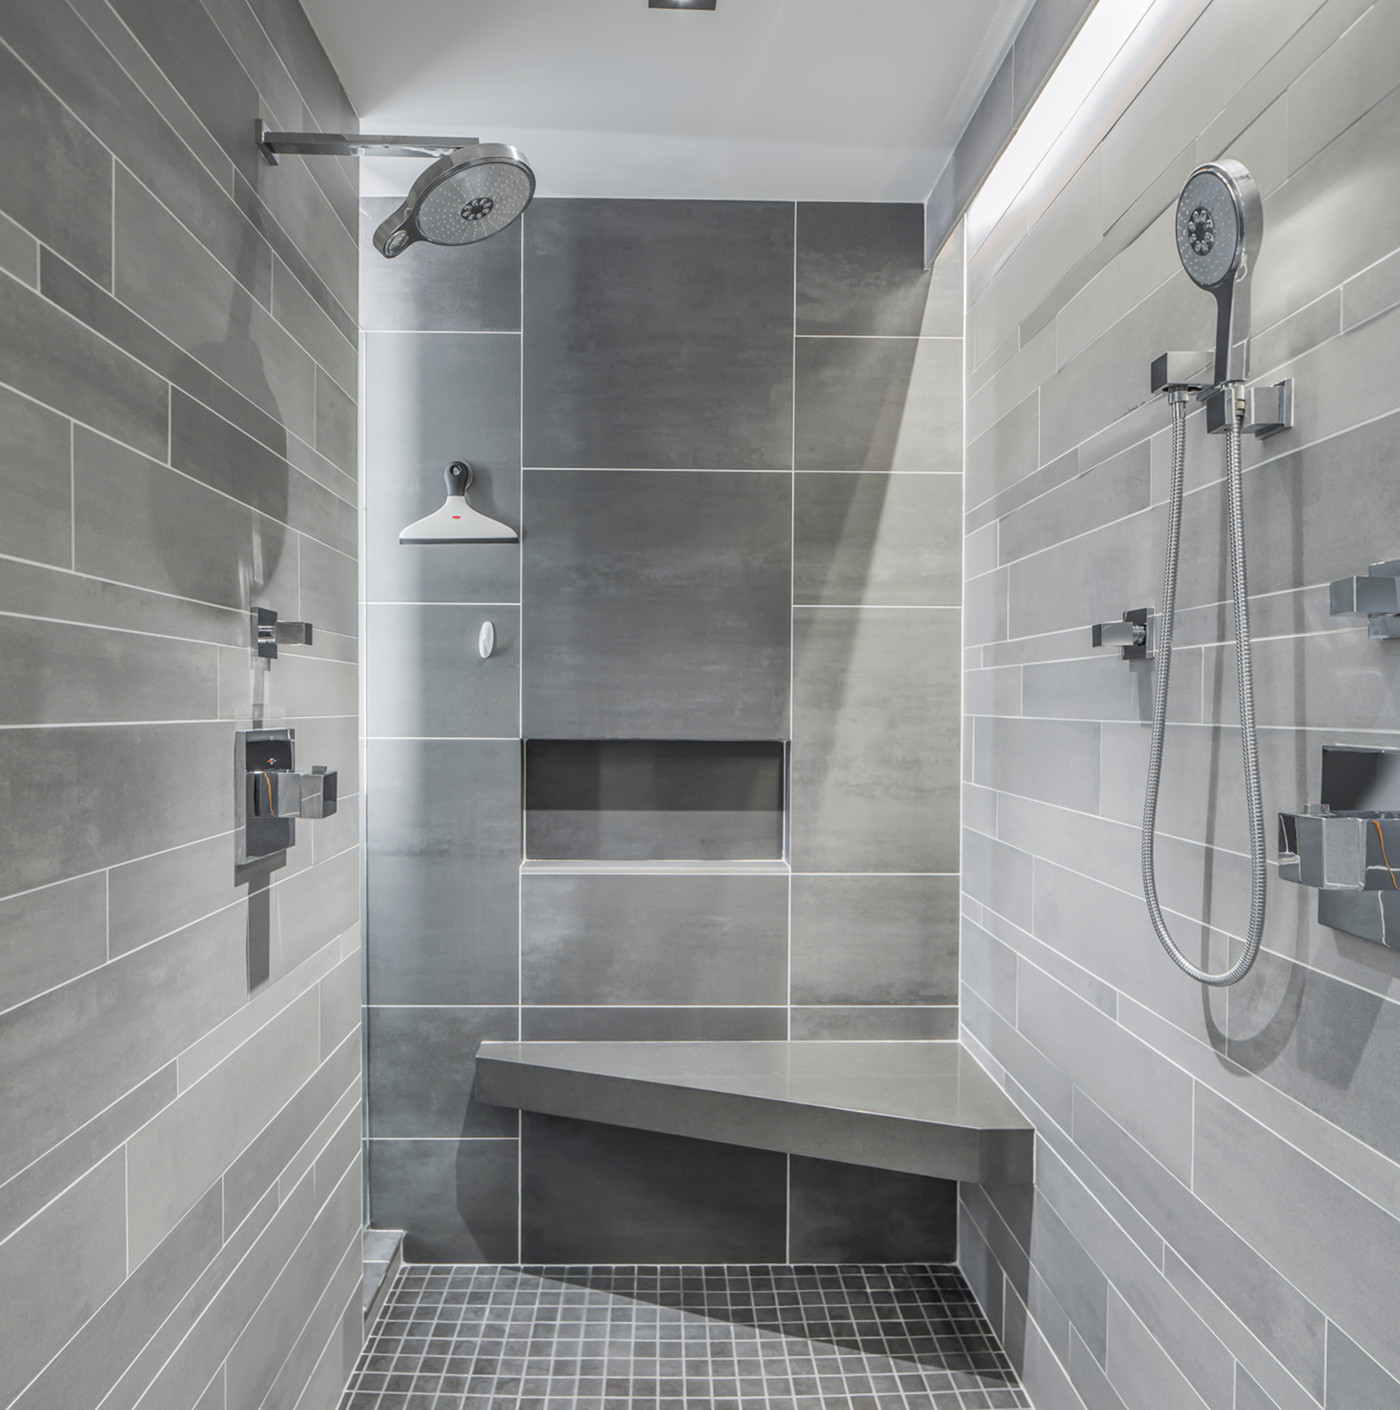
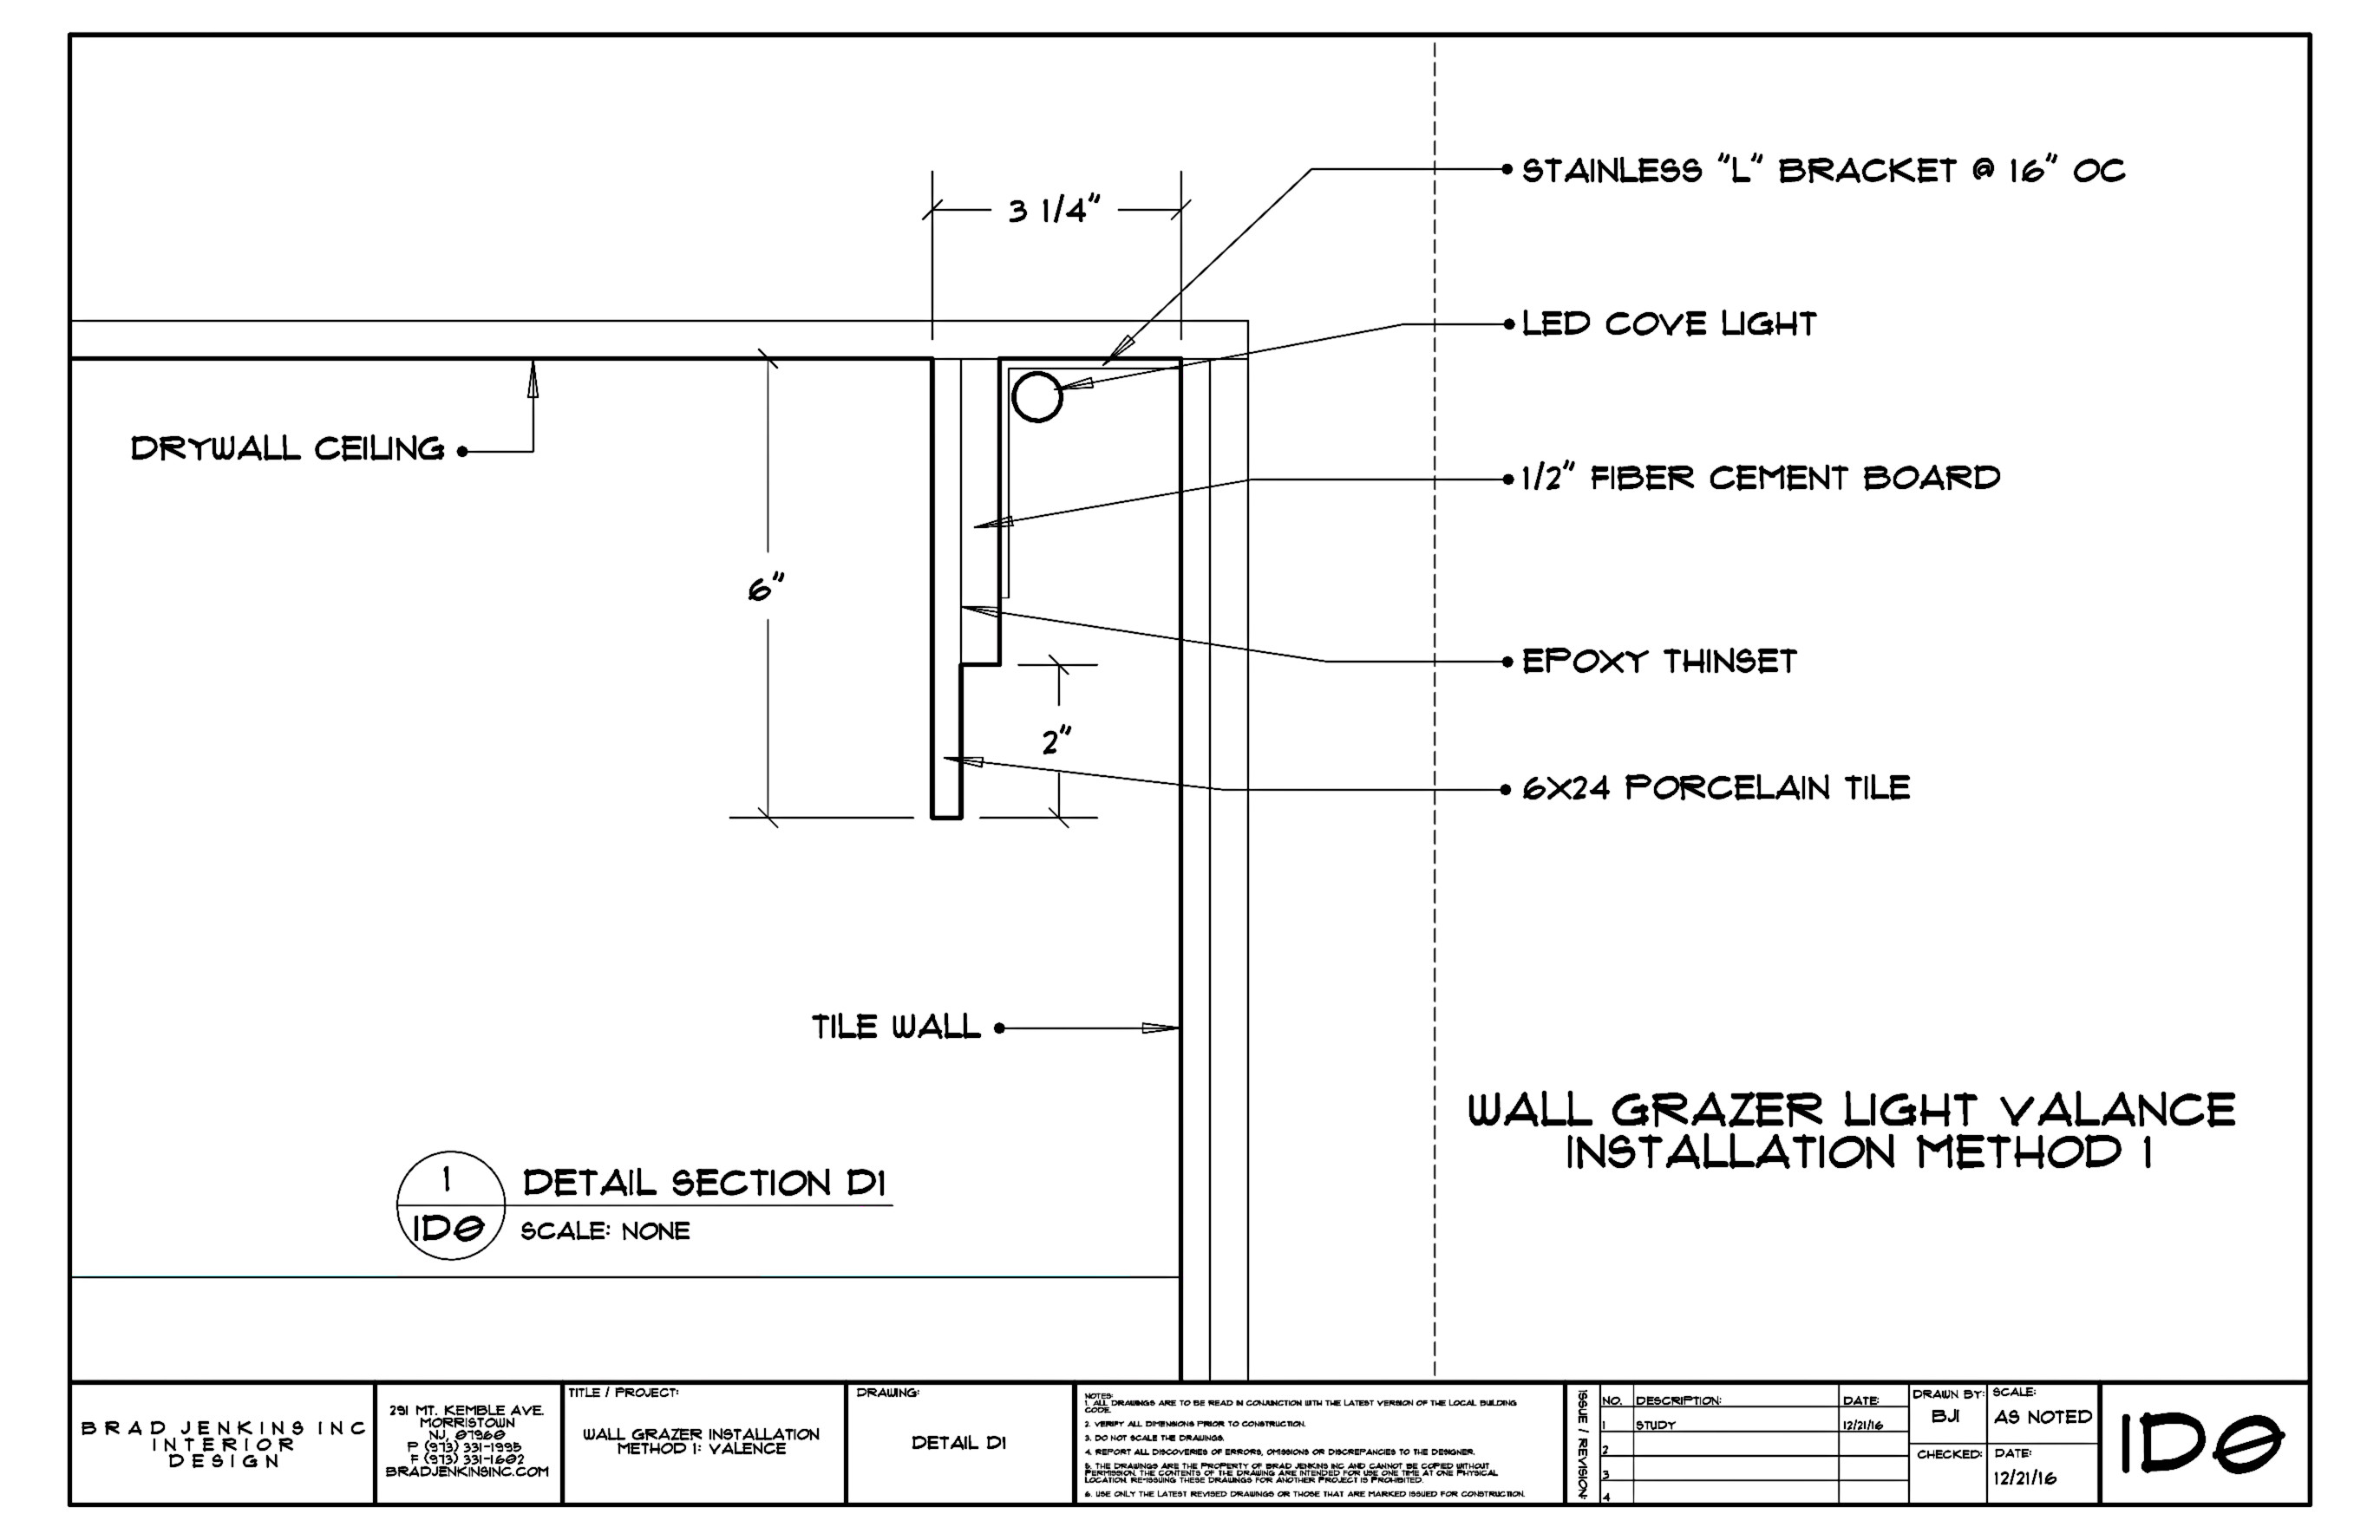 Installation method one [illustrated above]: Construct a valence to cover the light fixture. This method is especially useful if you are executing a remodel and you don’t want to get into re-framing the ceiling. Here you will simply create a surface mount valence to hide the light fixture. The two example pictures show tiled valences. The tiled option is great for showers as it tends to blend in with the tile wall beyond.
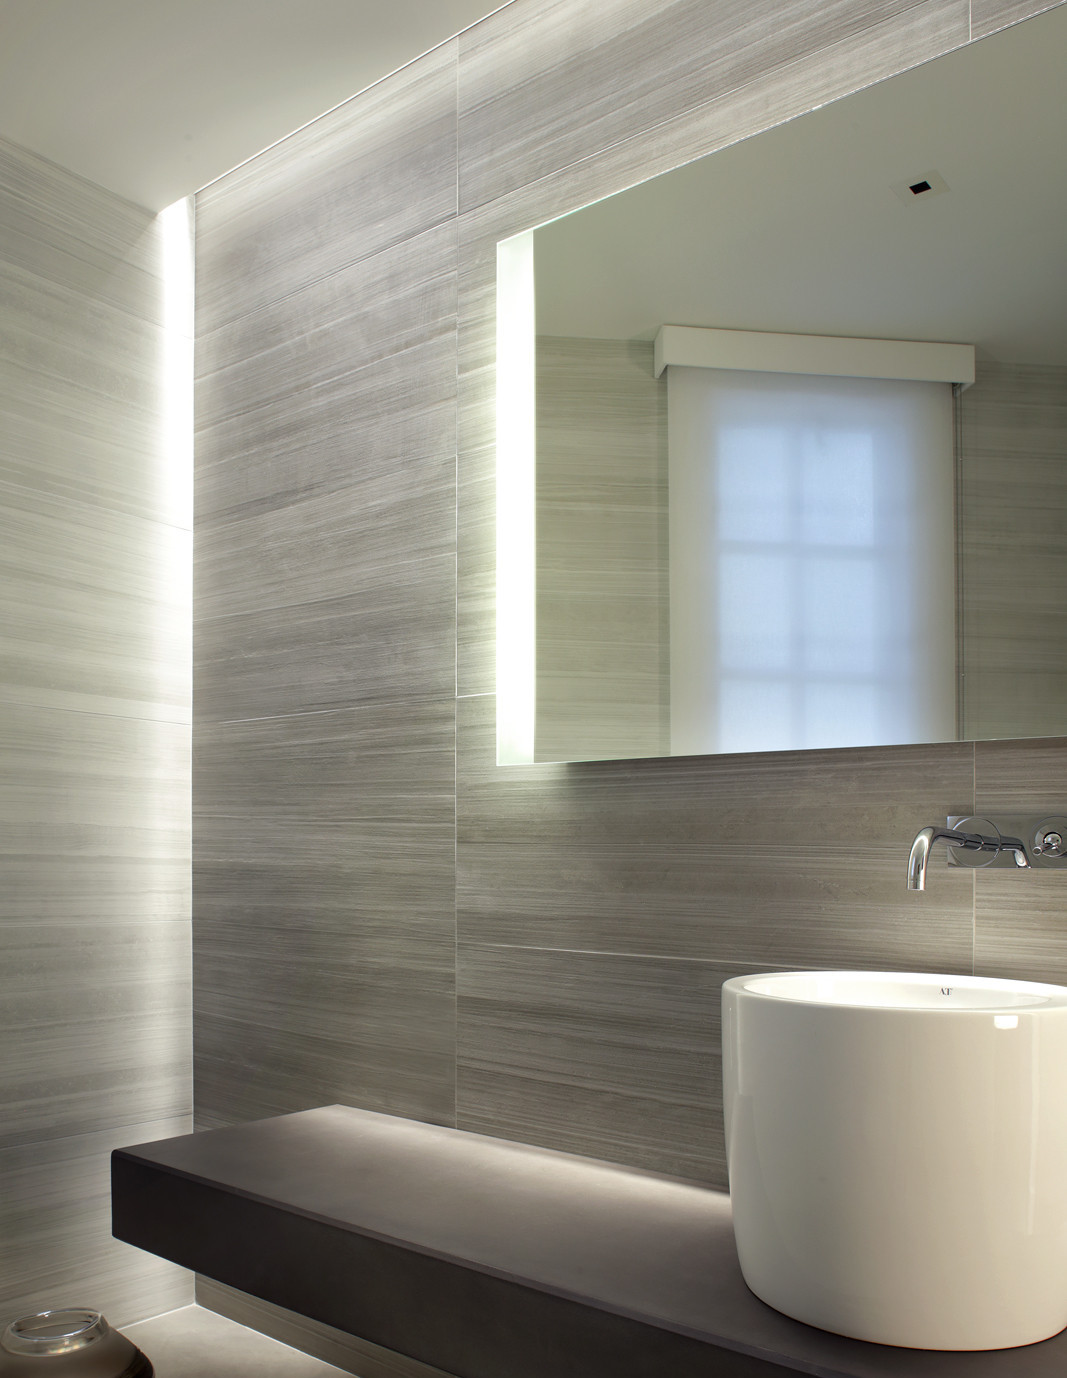
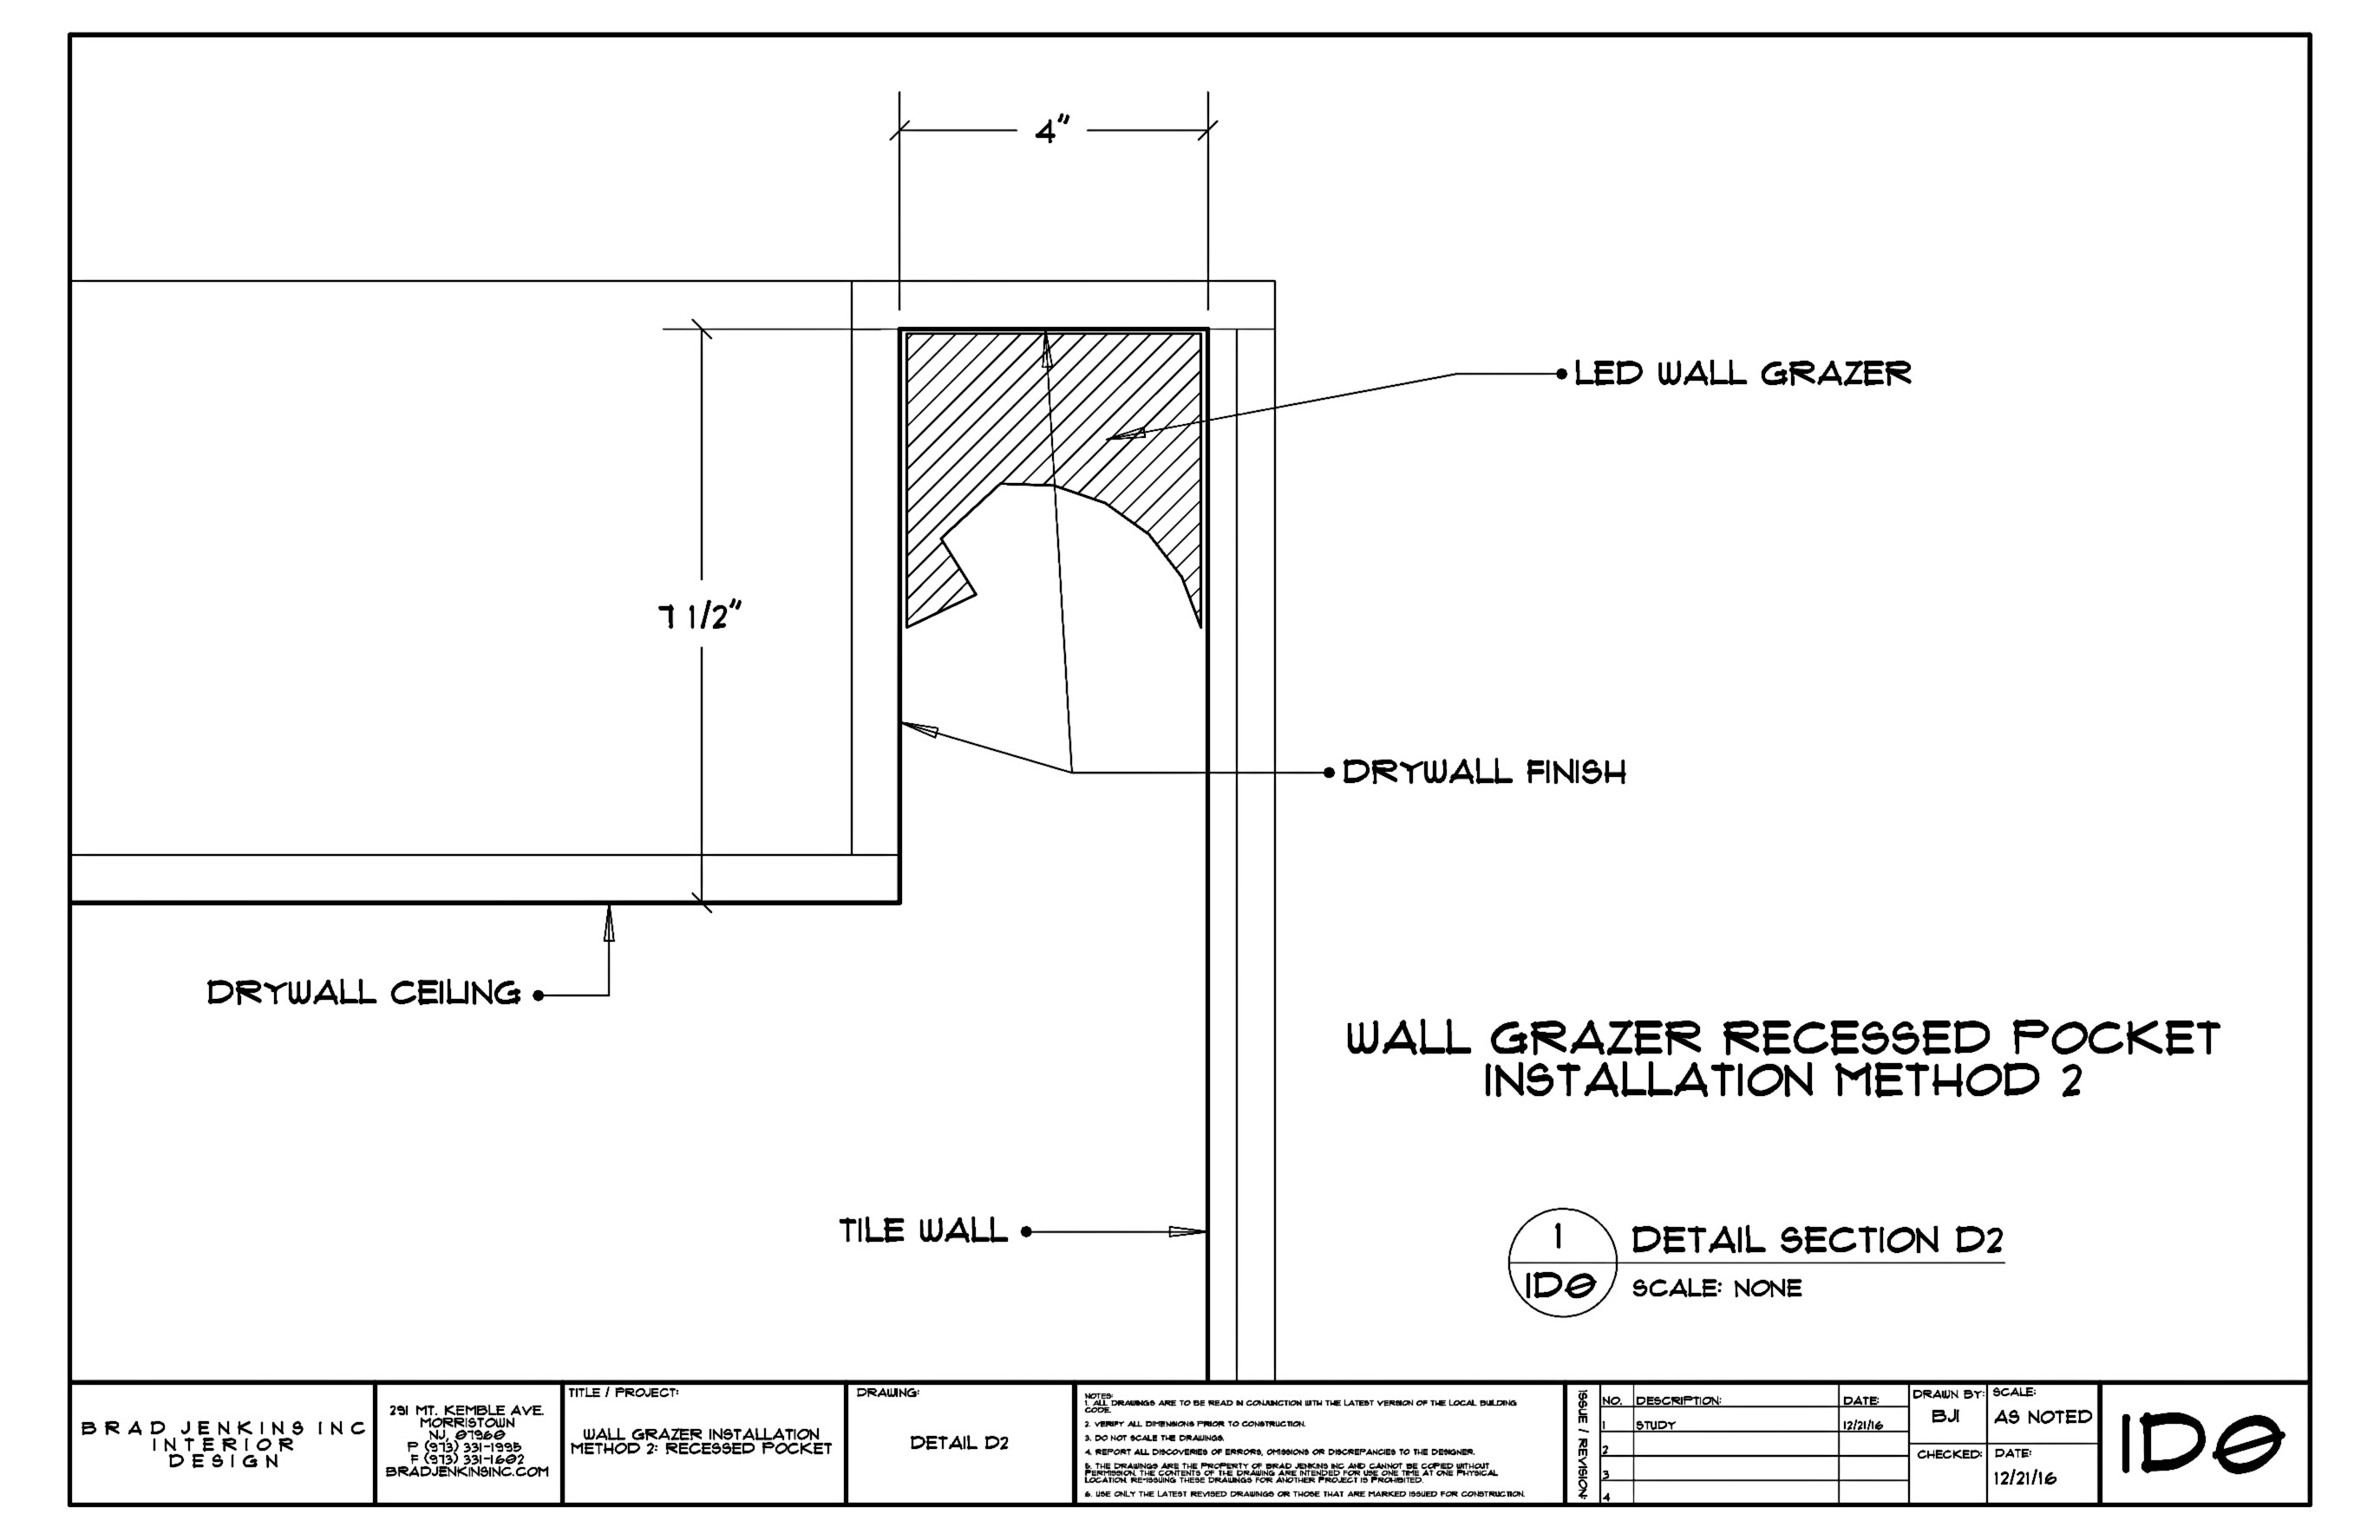 Installation method two [illustrated above]: Frame a recessed ceiling pocket. This is the best method if you are working with new construction or if the ceiling joists miraculously run in the correct direction. I prefer this option when possible as it will hide the light fixture completely. In the end you have a subtle painted drywall recess that will virtually disappear into the ceiling.
Don’t miss the update post: Possibly The Ultimate Bathroom Wall Grazer? Here we explore the creation of a dramatic shower wall grazer, including a video on how to frame the light pocket.
Good luck with your project! If you have any questions feel free to use the comment form below.
Read more blog posts about lighting here
Sign up below. New posts will be hand delivered to your in box. Stay in the know:


Hi there, thanks for the post. I’ve been researching doing this in a bathroom we’re adding to our basement and have been put off by the cost of the commercial options. I thought, this has to be possible and simple to DIY. I’m more of a fan of option 2 in your post, but had a question: does it matter how deep the pocket recesses into the ceiling? My issue is that it will be running across the joists, and I’d prefer to not fur down my ceiling if I don’t have to (it is already furred down a couple inches). If I simply cut a notch thru the furring and maybe slightly into the joist would that be enough to create this effect?
Hi Ben, the pocket should be deep enough to hide the light fixture. You don’t want to see the fixture as the bright glow will take away from the wall washing effect. Also consider that the pocket will play a role in directing the light down along the wall surface. I have found it best to go with 5″ min. on the pocket depth. As a rule of thumb, I wouldn’t notch any existing framing. We furred down the ceiling by 7-1/2″ in the bathroom with the pocket [pictured in the post]. The room had a 9′ ceiling so we had plenty of space to work with. How deep do you think you can make your pocket if you cut out the furring? How high is your ceiling? Another option would be to install a flush header or girder to open up a pocket. Feel free to email me a picture. – Brad