BRAD JENKINS INC

I N T E R I O R - D E S I G N

  • The Story
  • Projects
  • Blog
  • Contact

Rusty Stairs Install

November 2, 2016

rusty steel I-beam stairs installation cover picture

RUSTY STAIRS INSTALL: the third and final post in the “Rusty Stairs” series; where we document the design, fabrication and installation of our rusty steel I-beam stairs. In this part we will take a pictorial tour of the installation performed by Hamilton Metalcraft.

For more background on this project check out part one: Rusty Stairs and part two: Rusty Stairs Update.

rusty steel I-beam stairs installation picture 1

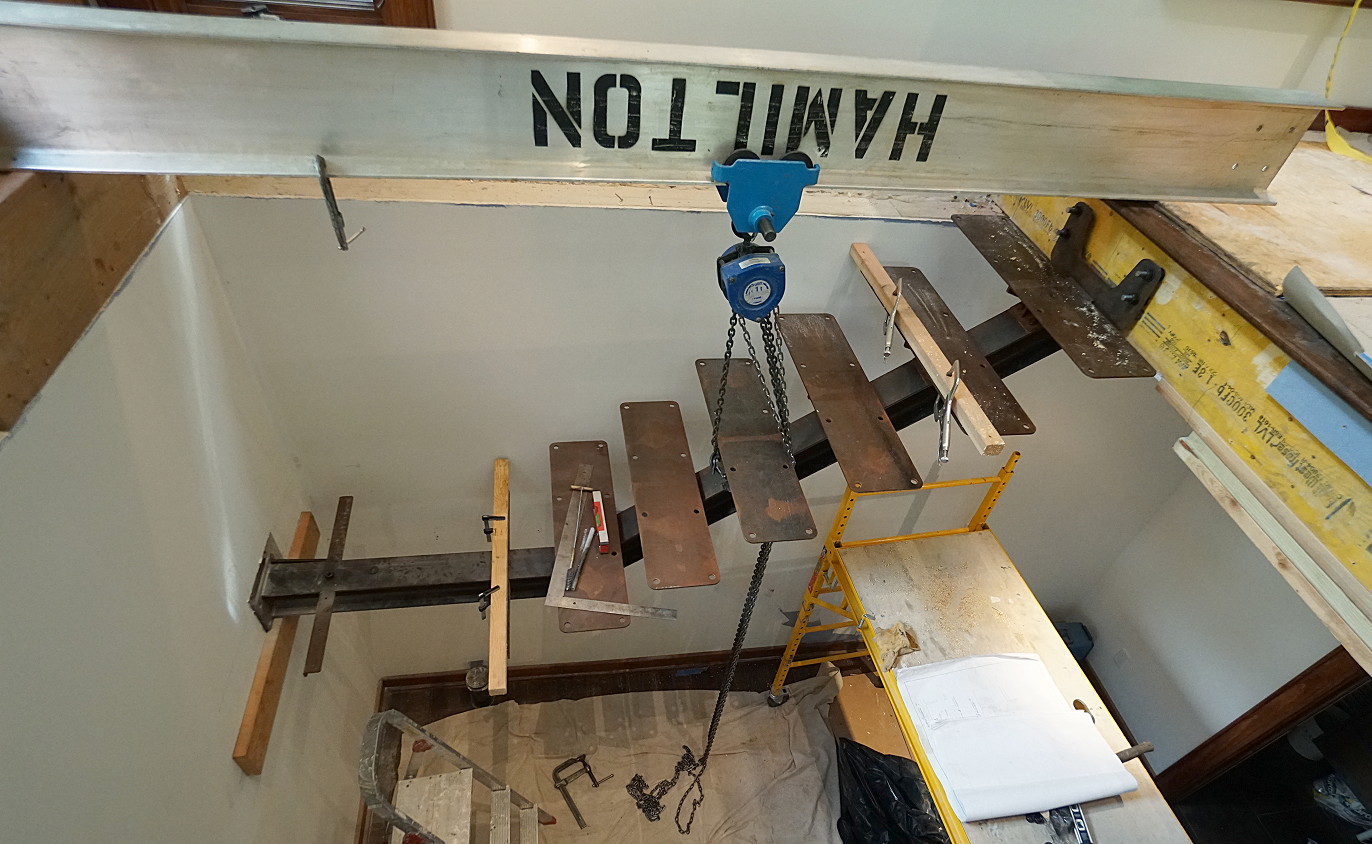
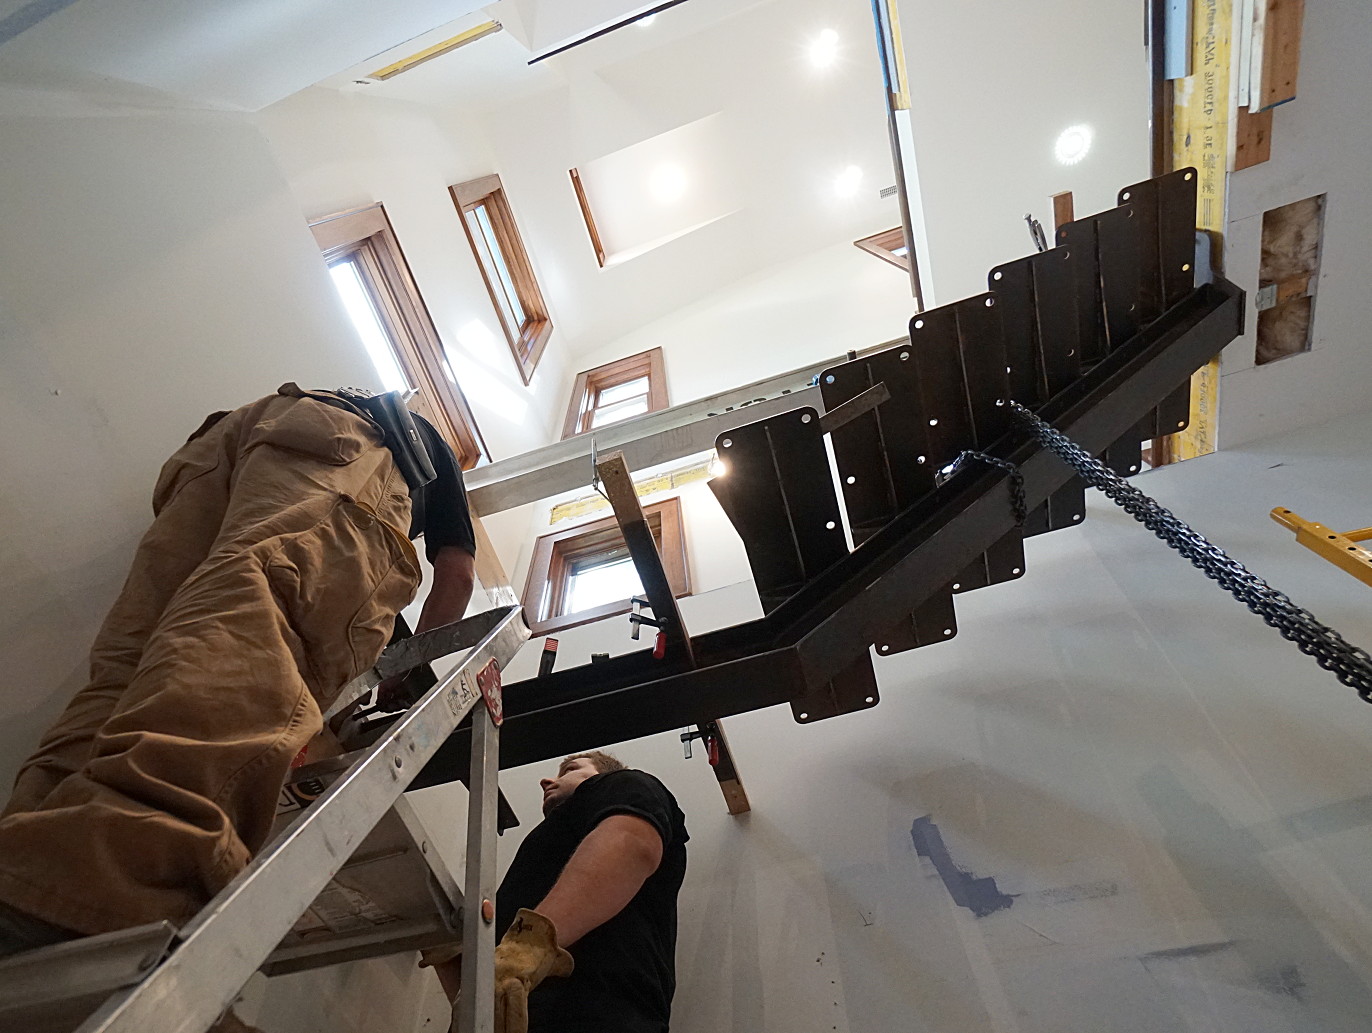
Above: A chain hoist is used to position each run of steel stairs. Technicians fasten each steel I-beam to the engineered framing by way of grade 8, HSS cap screws. Through-bolting ensures maximum strength.

rusty steel I-beam stairs installation picture 2

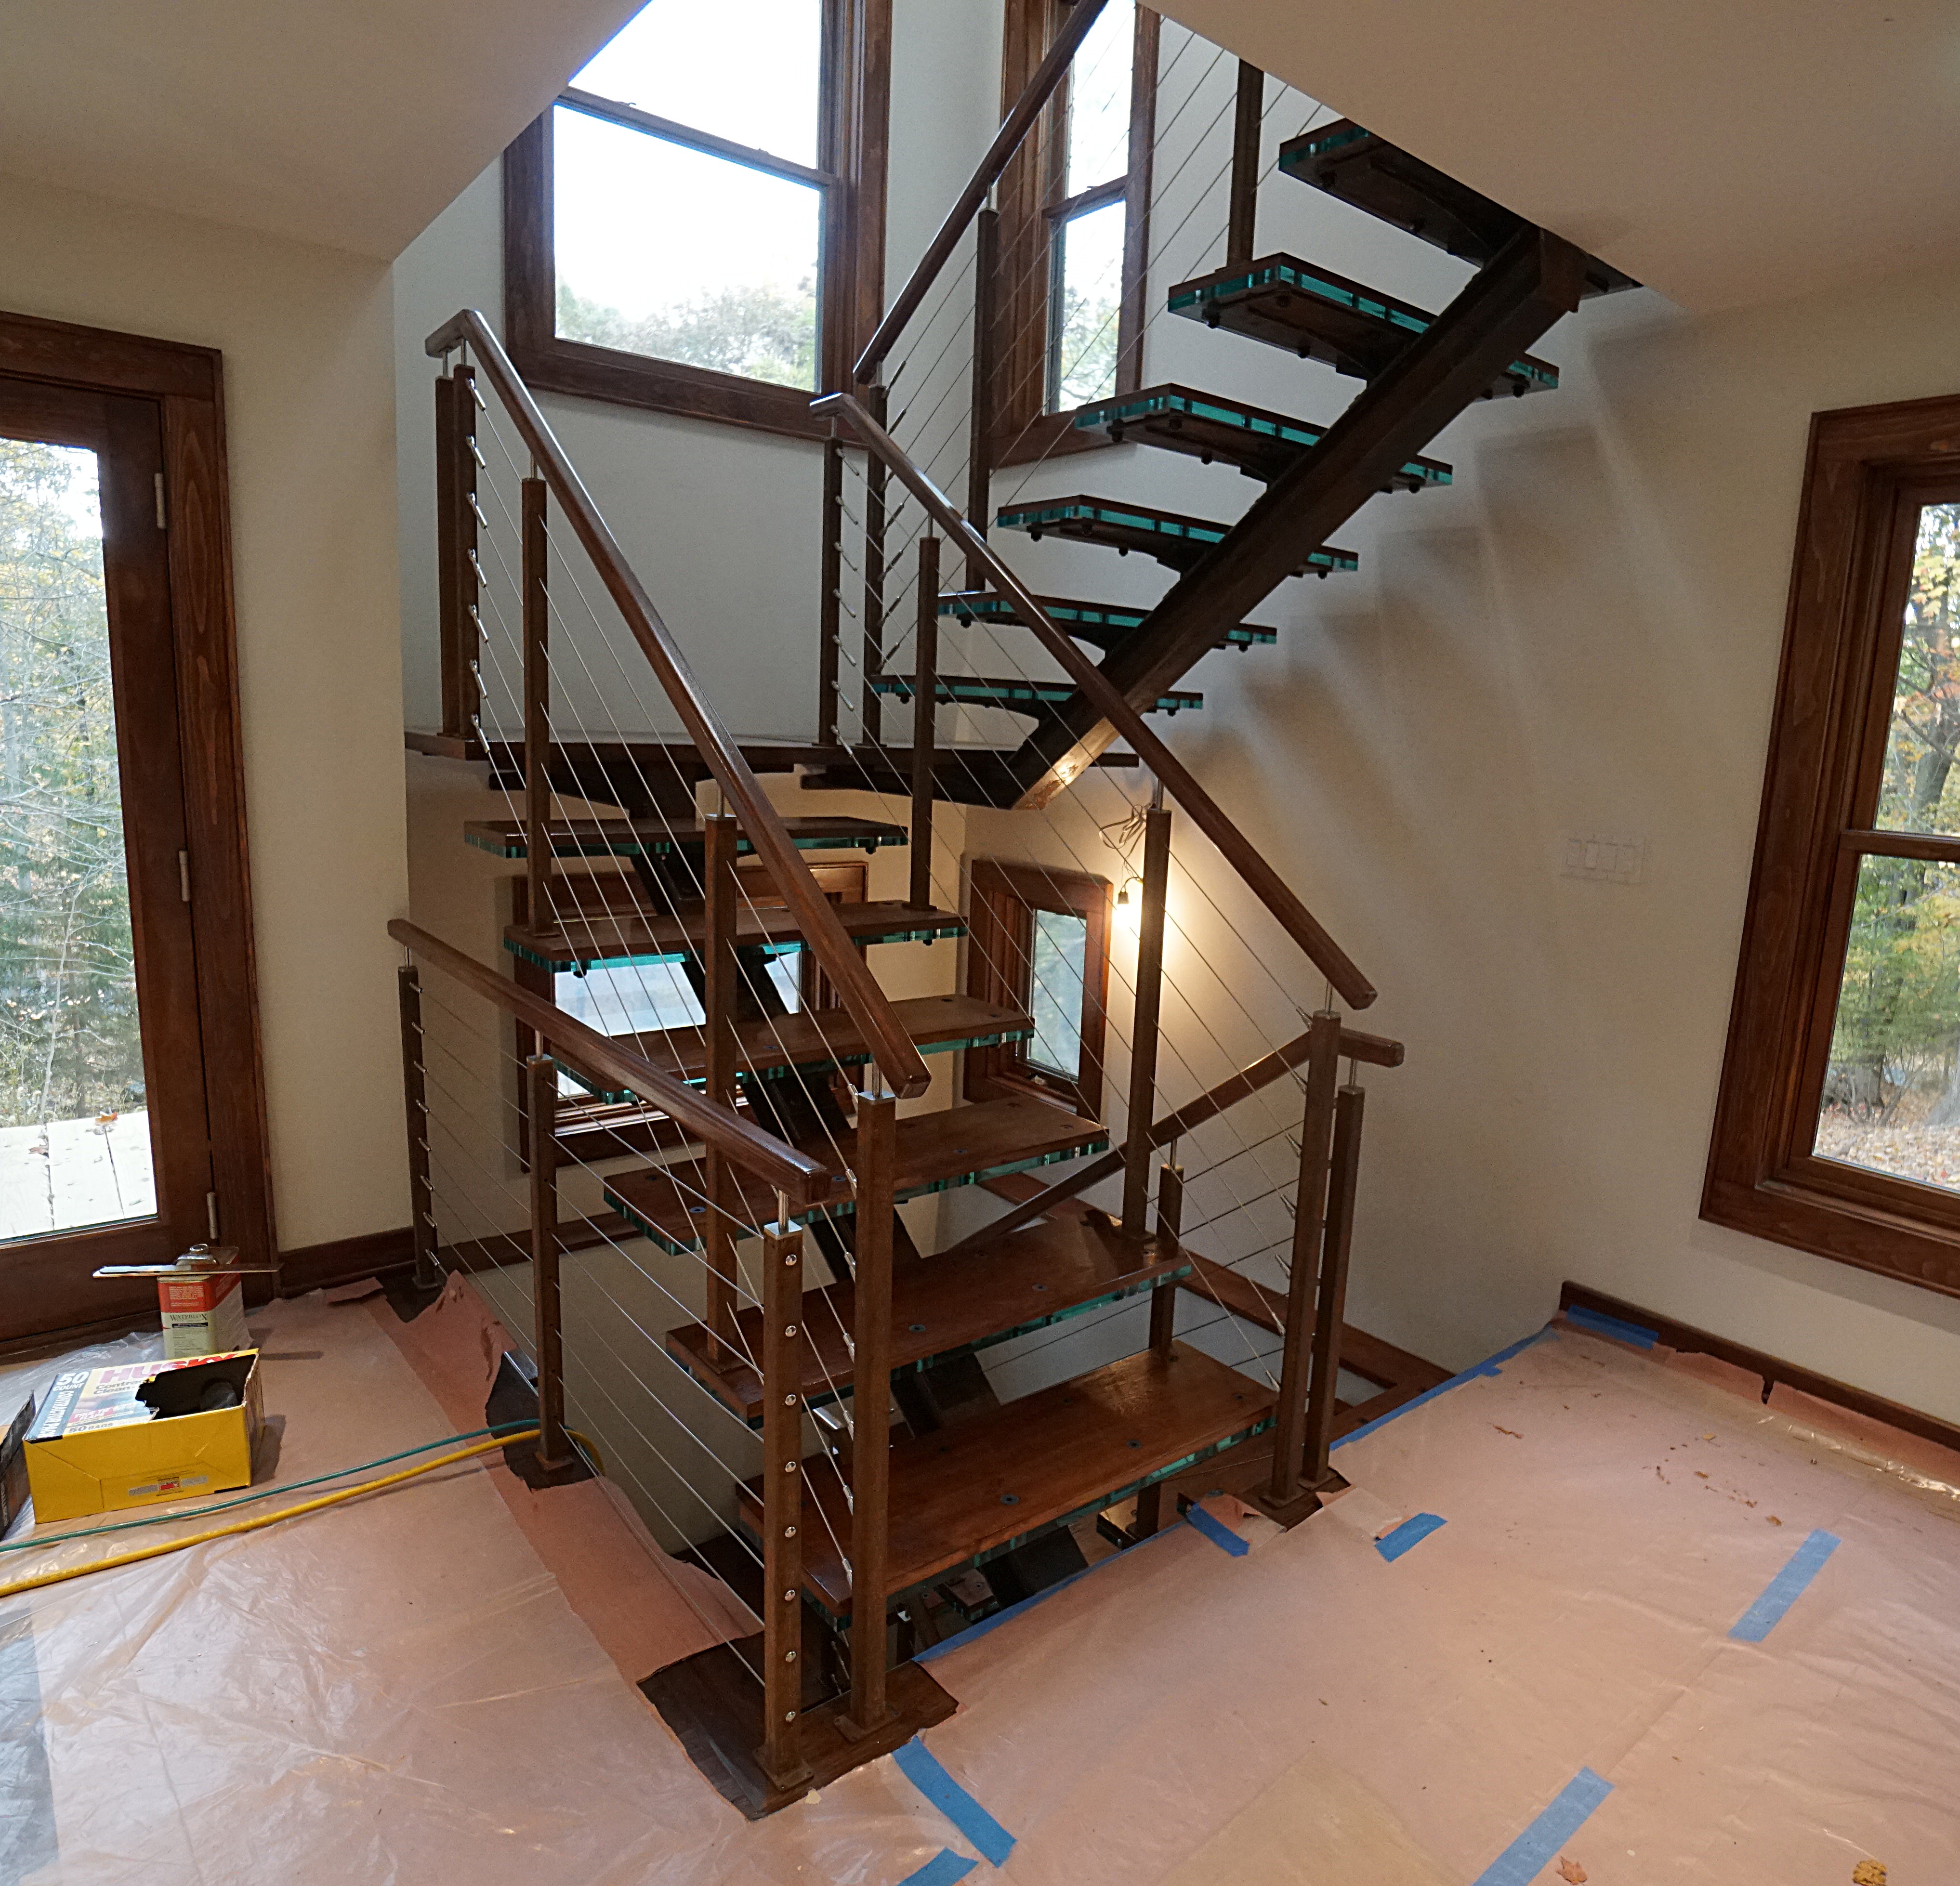
Above: A view up the stair tower from the lower level. The lone support for each stair run comes from the single W5x16 I-beam.

rusty steel I-beam stairs installation picture 3

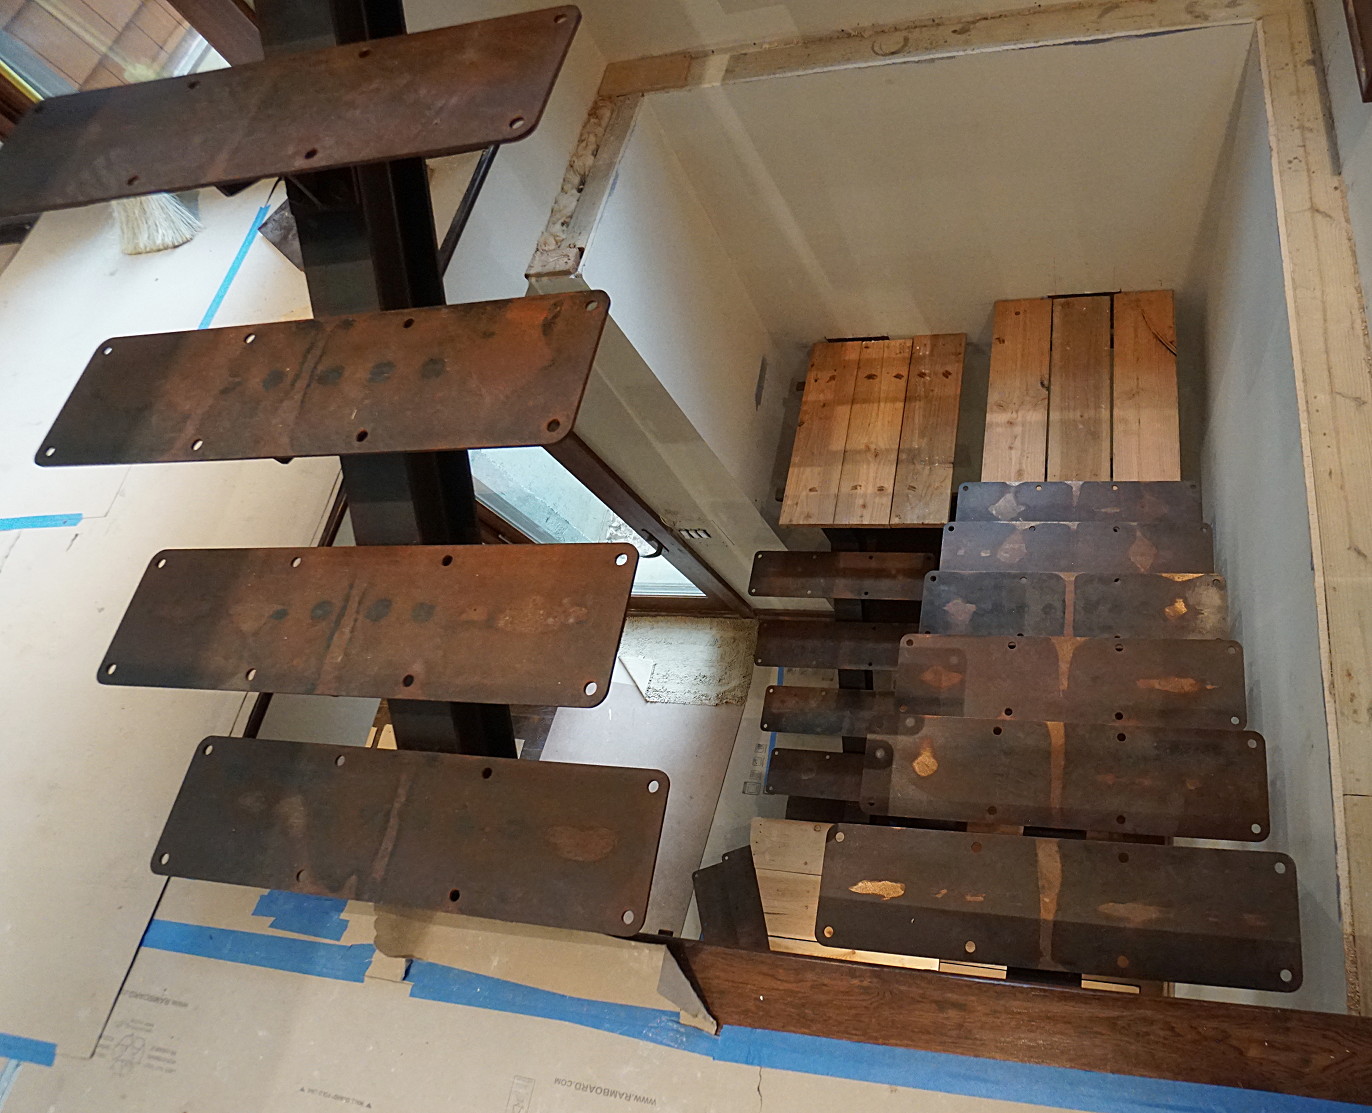
Above: A view from the first floor. Temporary landing platforms are in place.

rusty steel I-beam stairs installation picture 4

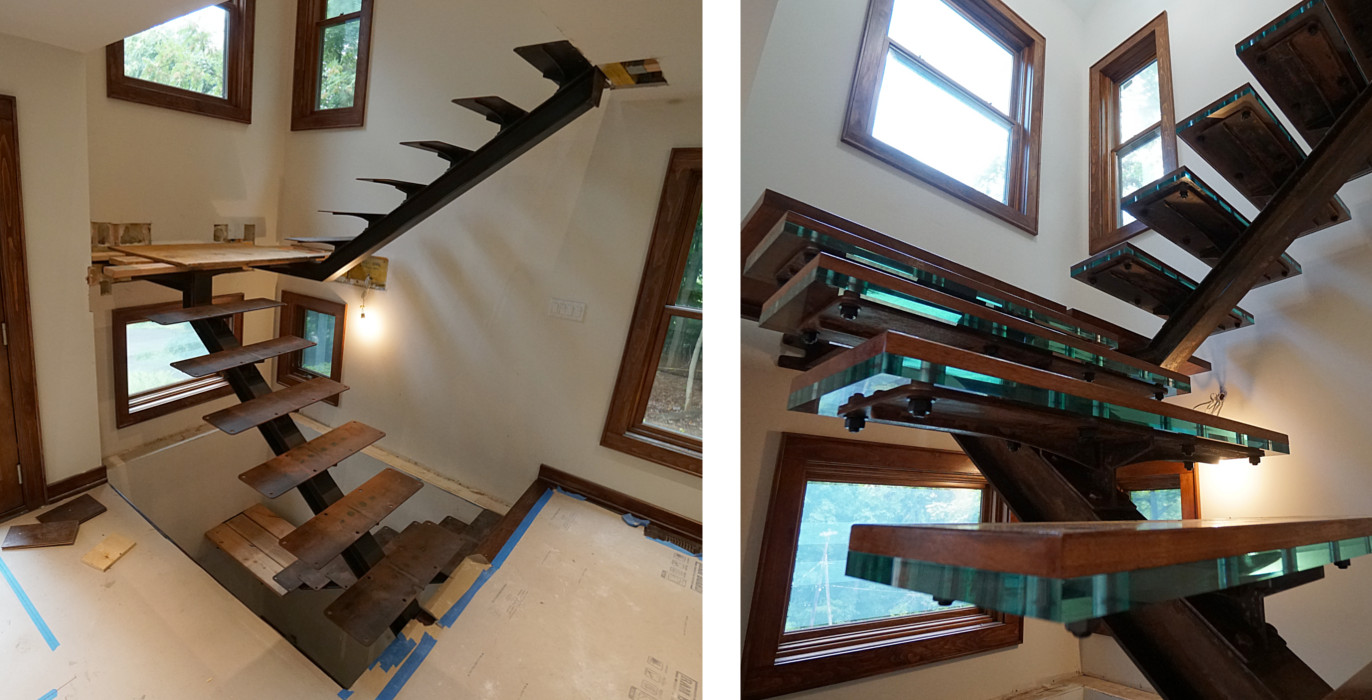
Left: The completed steel frame awaits the installation of treads and landings. Right: Hickory and clear acrylic material make up the stair treads created by Alchemy Construction.

rusty steel I-beam stairs installation picture 5

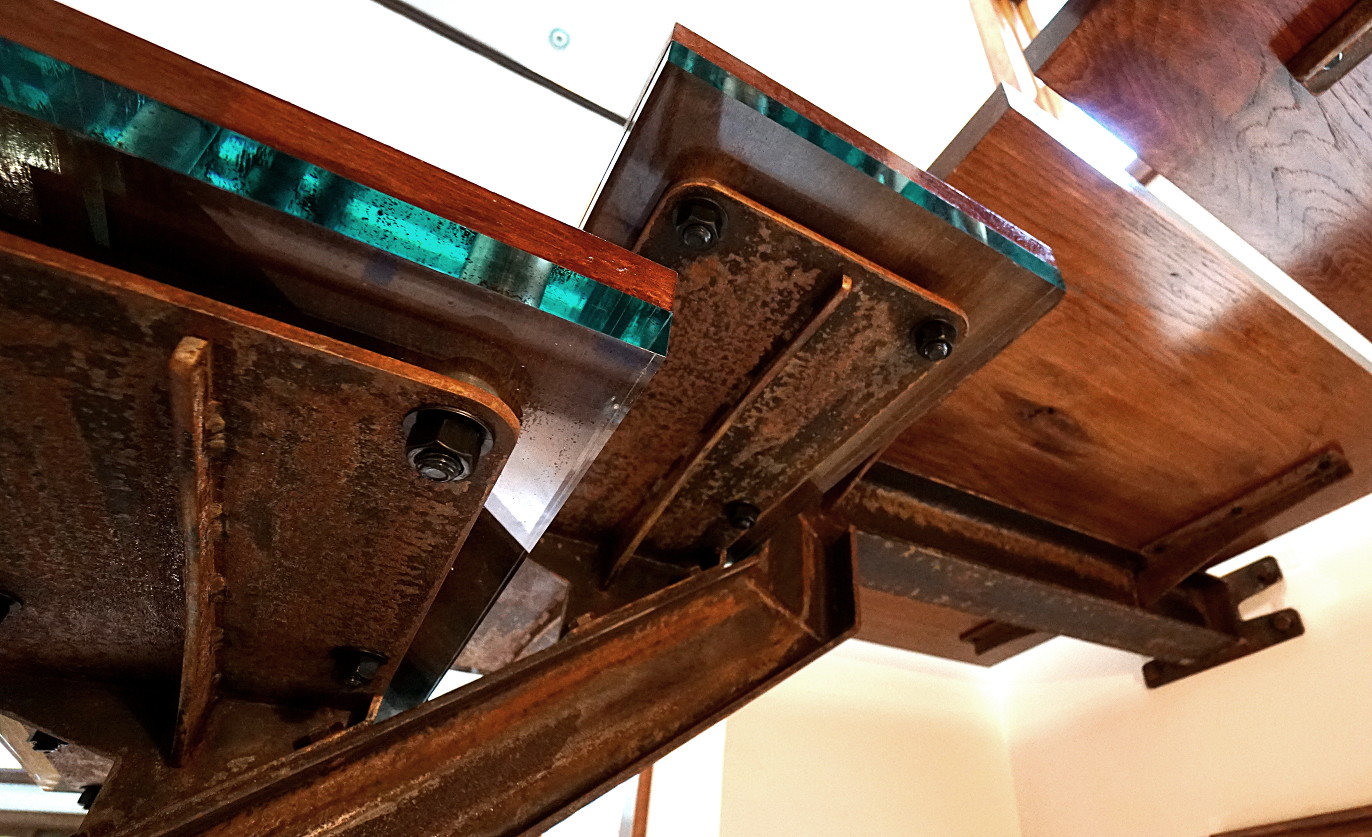
Above: This detail shows the sandwich construction of acrylic and hickory utilized for the stair treads. We had originally planned to use 1” glass for the treads. Complications with the tempering process along with weight issues triggered the exploration of acrylic.  The 1” thick acrylic material proved to be the better choice for a variety of reasons; one being the ease of machining, another being the relatively low weight. This product has a slight green tint to mimic the look of clear float glass when viewed from the edge. Glasplex Plastics LLC performed our acrylic fabrication.

rusty steel I-beam stairs installation picture 6

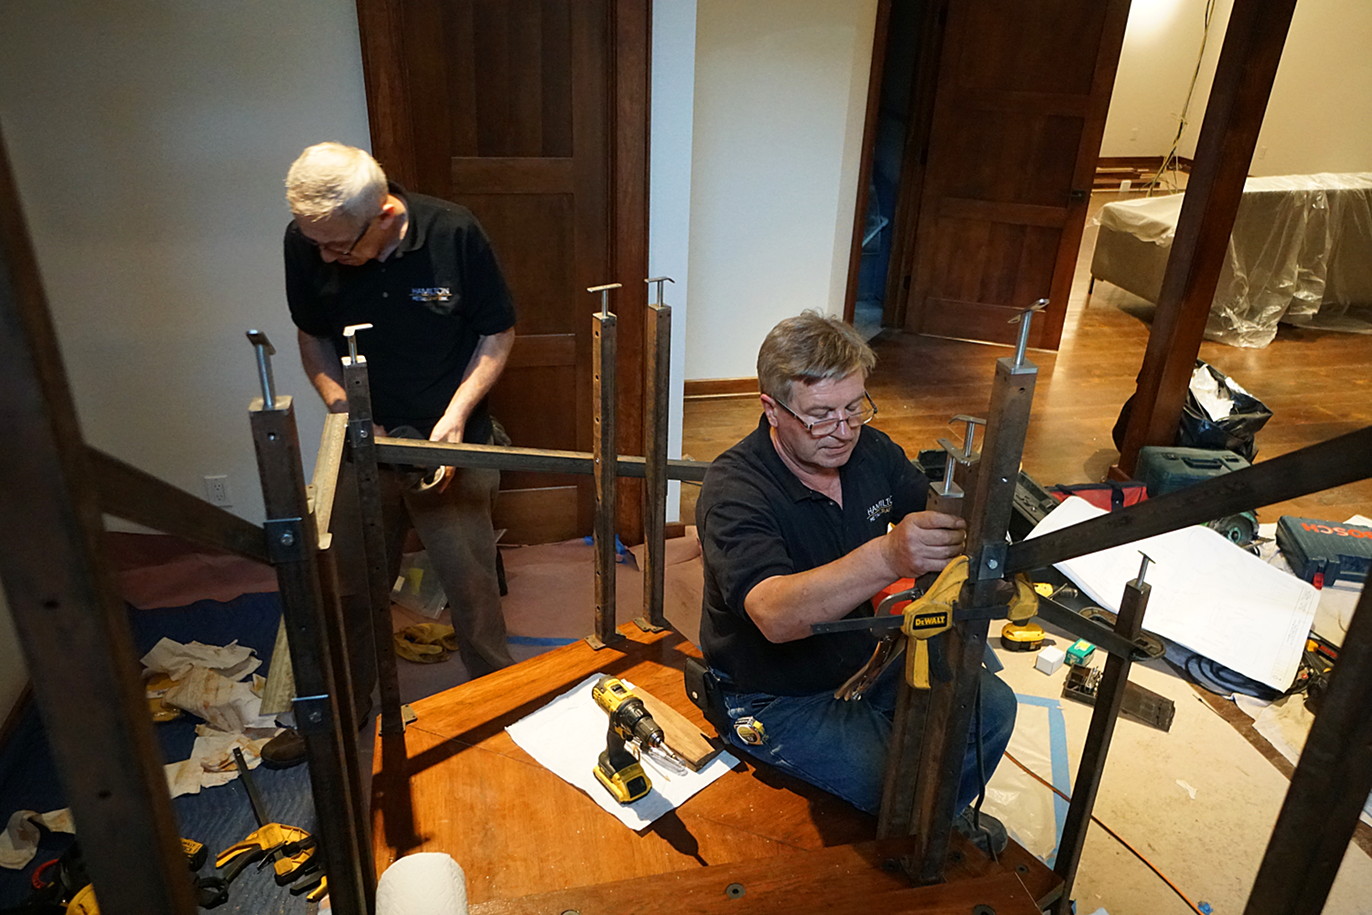
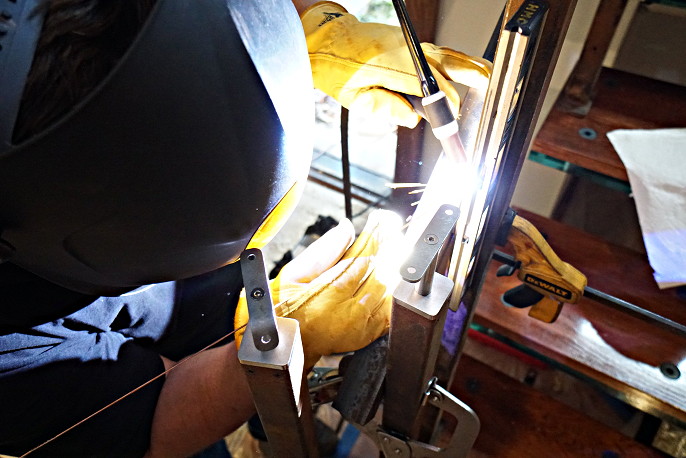
Above: Rail posts are installed on the hickory steps and landing platforms. In this picture Aleksander Kostuj of Hamilton Metalcraft fabricates a series of brackets that will hold the posts in position while the wood rail is installed. This process will ensure proper tolerances are held for the cable system.

rusty steel I-beam stairs installation picture 7

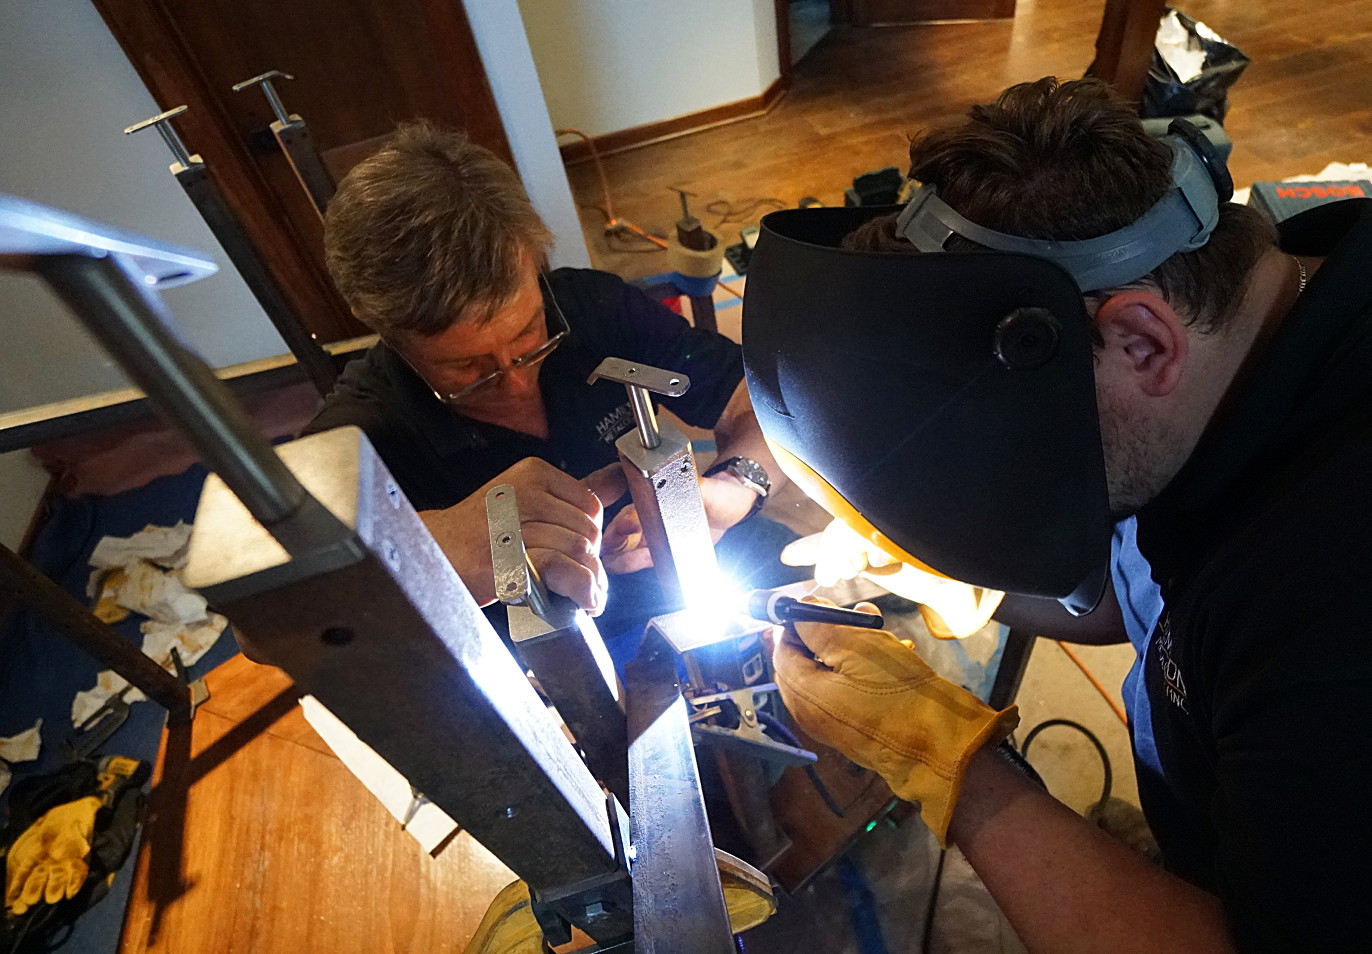
Above: Kamil Kostuj of Hamilton Metalcraft welds a temporary bracket in place. Kamil will remove the brackets once the hickory railing is in place locking everything together.

Rusty Steel I-Beam Stairs

rusty steel I-beam stairs installation picture 8

Above: Almost finished! Alchemy Construction has painstakingly installed the hickory hand railings. One more coat of polyurethane for the hickory parts and the stairs will be complete. Check out the finished product HERE.

Share

Facebook Google+ Twitter Pinterest Email

Back to Blog

Bradley Jenkins

While design is a huge part of my life, there are other things I like to do! I love spending time with my wife Denise and my kids Jake & Jenna. We are an avid ski family and spend many of our winter weekends skiing the Northeast. Tree skiing at Killington is a favorite pastime. During the warm months we enjoy the shores of Oak Beach, NY with it's laid-back atmosphere. To further my love of the outdoors I partake in frequent road cycling rides near our home in Morristown, NJ, where lush green country roads and small farms are in abundance.

Recent Posts

  • Transforming 613
  • Possibly the ultimate bathroom wall grazer?
  • Destination Master Bath Full Time-lapse
  • Hand Troweled Concrete
  • Destination Master Bath Frame

Stay in the know

Categories

  • Bernardsville Project
  • Croton On Hudson
  • Design
  • Destination Master Bath
  • Florham Park
  • Lighting
  • Materials
  • Stairs and railings
  • Working with a pro
  • Works-In-Progress

Recent Comments

  • brad@bradjenkinsinc.com on Possibly the ultimate bathroom wall grazer?
  • grateful on Possibly the ultimate bathroom wall grazer?
  • brad@bradjenkinsinc.com on Wall grazers in the bathroom
  • Ben on Wall grazers in the bathroom
  • brad@bradjenkinsinc.com on How to customize a spec home floor plan part 2

Archives

  • April 2021
  • January 2019
  • November 2018
  • August 2018
  • July 2018
  • May 2018
  • April 2018
  • April 2017
  • March 2017
  • February 2017
  • January 2017
  • December 2016
  • November 2016
  • October 2016
  • September 2016
  • August 2016
  • July 2016
  • June 2016
  • May 2016
  • April 2016
Brad Jenkins Inc

contact

BRAD JENKINS INC
Morristown, NJ USA
info@bradjenkinsinc.com

Connect

Facebook LinkedIn Houzz Instagram
Houzz

Copyright 2026 BRAD JENKINS INC