Doesn’t suck is a good thing unless you are referring to a kitchen island exhaust hood. This one is a big “lesson learned”; perform your own product research no matter how futile or redundant it may seem. Accurate info doesn’t always come from your appliance representative or even from the manufacturer’s specifications. Once again the online forums are the place to turn for real world info.
THE STORY
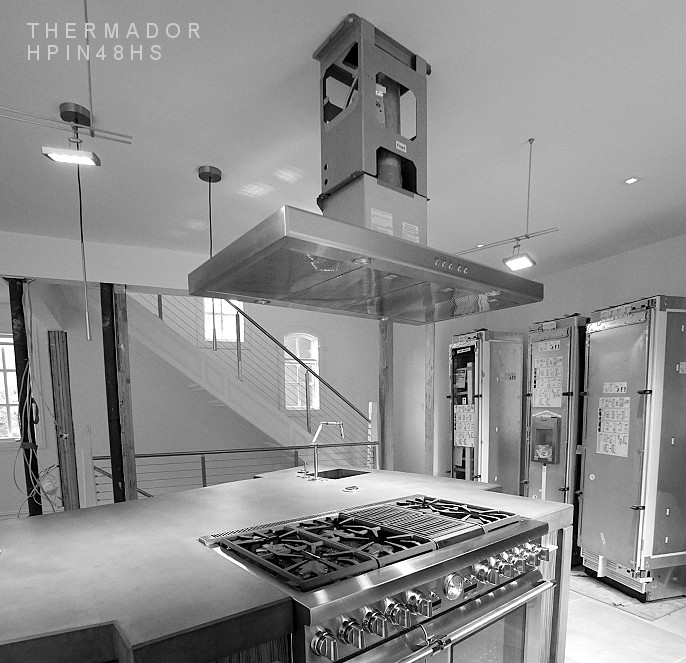
I am in the throes of a complex kitchen remodel. I am very drawn to Thermador’s Fresh Food Columns [T24IR800SP, T18ID800LP, and T18IW800SP] as they allow one to create fully integrated enclosure systems; perfect for building into the stainless steel wall that we are incorporating into this kitchen. We decide to complete our appliance package with Thermador products to take advantage of the “One Two Free” promotion. Through the promotion, we receive a free matching professional island hood [HPIN48HS] with 1300 CFM remote blower [VTR1330E]. To top it off; the hood actually looks great. Seems like a no brainer, correct?
THE DETAILS
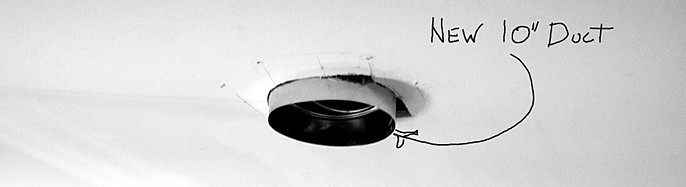
OK, we have this great appliance package on order so let the construction begin. First we gut the kitchen down to the framing. We consult with our appliance rep who advises us to run 10” round duct in the ceiling. However, the flange on the hood is for 6” duct. Plus the chimney will only accommodate a 6” pipe. These issues should have thrown up the first red flag. We follow the reps recommendations and duct the hood with 6” pipe. We elbow out into the ceiling with 6” duct and run about 5’. From here we transition to 10” round duct for the rest of the run to the outside of the building. The 1300 CFM blower terminates the duct run on the exterior.
I should mention that this is Thermador’s largest island hood with the most powerful remote blower. We have installed the components according to the manufacturers’ specifications. This hood is shown in the Ventilation Guide from Thermador as a match for our range. Great, we are moving along, the ductwork is complete so up goes the drywall and finish.
THE SCALLOPS
Fast forward a couple of months and the kitchen is 90% complete. We proudly notify the client that he can finally cook in his new state-of-the-art kitchen. We feel awesome! My team has delivered an amazing kitchen. My client decides to test the new hood by pan searing a batch of fresh scallops. Within minutes thick smoke suddenly fills the house. It’s as if we fired up a Weber charcoal grill in the kitchen. After some testing and troubleshooting we quickly realize this is it, this is the best this hood will ever perform. My client is livid. I contact our appliance rep and he gently reminds me the hood was free. They can’t do anything about our issue!
THE SOLUTION
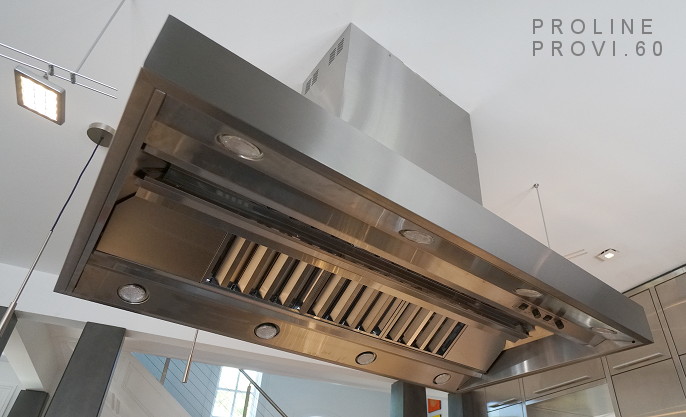
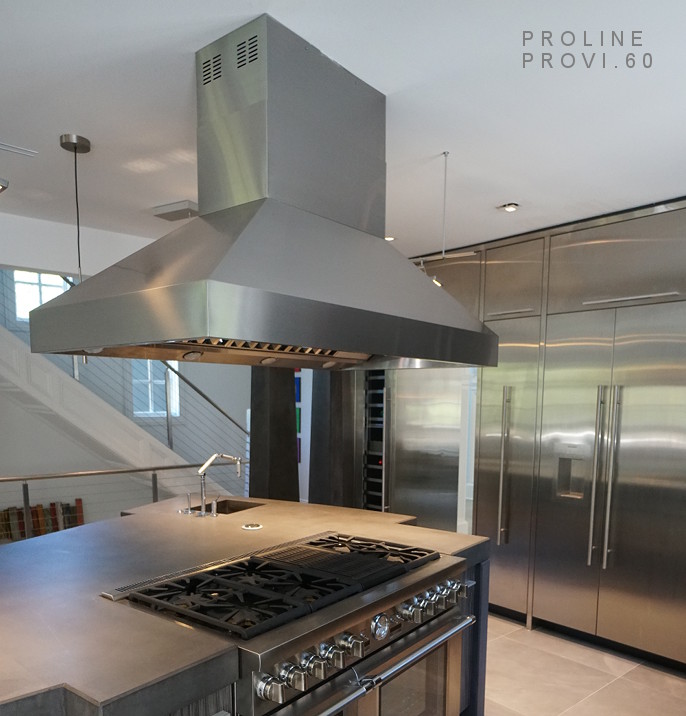
After a few days of debate and research we realize the only viable solution will be to acquire another hood. My client is an avid amateur chef. He wishes to utilize the 112,000 BTU range on a regular basis. The kitchen exhaust is critical to his comfort and passion as a chef. My research and our timeline land us with a company that I have never dealt with: Proline. I settle on a large, pseudo commercial hood [PROVI.60]. The new install requires us to take down some sheetrock and extend the 10” round duct all the way to the hood. A few days later and we have a modified duct system and the hood arrives by expedited freight. Our team installs the new hood and we discover that our new hood sucks, bigtime!
LESSONS LEARNED:
- Always perform your own research when specifying any type of product.
- For the avid chef; an island hood should be wider and longer than the cooking surface. Wide enough to catch the fumes that rise with a trajectory that is angling away from your hood. I went with a hood that is 60” x 33-3/4” for our 48” range. Note that island hoods are a challenge to begin with.
- Specify a hood that is concave on the bottom surface. This will capture the smoke and hold it just long enough for the blower to pick it up. Flat bottomed hoods are easily overwhelmed. The smoke will curl around the bottom and spill over the sides.
- Specify the largest CFM that you can. Variable speed is a great option as you will not always require full power. I have found that the blower mounted in the hood unit will perform better versus the external mounted units. Don’t be misled by the myth that external blowers are quieter; at these CFMs nothing is quiet.
- Stick with large duct sizes; 10” or 12”.
- Install the hood as close to the cooking surface as possible with a minimum distance of 30”. The average height (5’-10”) person will feel comfortable with the hood at 32” above the cooking surface.
- Don’t forget the make-up air. We installed our make-up air damper in the attic to pull air in through the soffit vents. Fresh air is dumped into the HVAC return duct while the hood is operating above 400 CFM.
IN ALL FAIRNESS
The Thermador hood:
The Thermador island hood [HPIN48HS] and 1300 CFM remote blower [VTR1330E] are actually very nicely engineered and manufactured products. The hood is beautifully built and has many features with lots of attention to little details like the stainless steel buttons that have a precision feel. For most clients this would have been totally sufficient. I would use this product with a 36” – 40” range any day and would expect it to function well under heavy use. The hood installed easily and was painless to properly level.
The Proline hood:
The Proline island hood [PROVI.60] is of a much simpler “no-frills” design, much like a commercial style hood. The basic hood, blower and filter system are nicely made. The chimney cover and installation brackets, however, are poorly designed and shoddily constructed. My installers ended up abandoning all of the incorrectly positioned threaded inserts on both the ceiling bracket and on the hood. They instead used some structural self-tapping fasteners. The hood mounting system, as designed, has no ability to adjust for level. Our solution was to construct a level platform to place the hood on and then fasten it to the brackets that we had to field cut. The hood comes with a 10” diameter take-off on top of the blower unit for the duct connection; however, the ceiling mount frame has about an 8-1/2” space at the top for the duct to go through. We had to trim our 10” round duct to fit around the top frame. To top it off, our stainless steel chimney cover split along the welded edge upon our first installation attempt.
Proline was very quick to send out a replacement chimney cover once I filled them in on the issues. They did attempt to help the installers via phone support; however, in the end it made more sense to abandon the original fasteners and threaded inserts.
The positive on the Proline is in the performance, the hood works great. It may be worth the installation hassles, especially if you know about them up front, I would specify the product again.